Getting Started With Qt
The goal of this exercise is to introduce you to the basic workflow for programming Qt GUIs. We will take you through the steps needed to run a minimal “Hello World” application using Qt.
Note that the we focus here on a fairly low-level approach, in which code is created using a regular programmer’s text editor. IDEs such as Qt Creator are available, which will take care of the low-level details of setting up a project for you. You might want to use those in future, but we recommend that you follow this approach to start with, so that you understand the nuts and bolts of how Qt applications are structured and compiled.
Accessing Qt 6 on SoCS Machines
The instructions below apply only to SoCS Linux PCs.
These steps should be carried out before your first use of Qt 6 on an SoCS machine. You will only need to perform Steps 1 & 2 once.
Start a text editor and edit your shell configuration file,
~/.bashrc.Add the following to the end of the file, then save it:
PATH=/usr/lib64/qt6/bin:$PATHStart a new terminal window. You should be able to access the Qt 6 tools & libraries from within this window.
“Hello World!” in Qt
Qt is a C++ framework, so the most direct and efficient way of using it is to write your application in C++1.
In your terminal window, use the
mkdircommand to create a new directory namedhello, thencdinto this new directory.Start up a text editor of your choice in this
hellodirectory and create a file namedmain.cpp. Add the following C++ code to this file. Save the file when you’re done.WarningTake care to enter the code exactly as shown.
You can use the ‘Copy to Clipboard’ feature to copy-paste the code, but we recommend actually typing it in, to build ‘muscle memory’ and increase your familiarity with the features of Qt.
1#include <QtWidgets> int main(int argc, char* argv[]) { 2 QApplication app(argc, argv); 3 QLabel* widget = new QLabel("<h1>Hello World!</h1>"); 4 widget->show(); 5 return app.exec(); }- 1
-
A single
#includegives you access to the entire Qt Widgets module. (You can include widget definitions more selectively if you prefer.) - 2
-
All Qt applications must create a single
QApplicationobject in this way. It manages user interaction and allows for limited configuration of the application via command line arguments. - 3
-
A
QLabelwidget is created on the heap withnew, and referenced with a pointer. We ‘cheat’ and change the appearance of the label text using the widget’s limited support for HTML, but there are better ways of doing this. - 4
-
Invoking the
show()method on the top-level widget makes everything visible. Any widget can act as the top-level widget, and therefore as the application window. We do this here to keep things simple, though it is generally best to use the widgets specifically designed for this purpose. - 5
-
Invoking
exec()on theQApplicationobject starts the event-handling loop.
Building & Running The Application
In the
hellodirectory, alongsidemain.cpp, create a file namedCMakeLists.txtcontaining the following code:cmake_minimum_required(VERSION 3.16) project(hello VERSION 1.0.0 LANGUAGES CXX) set(CMAKE_CXX_STANDARD 17) set(CMAKE_CXX_STANDARD_REQUIRED ON) find_package(Qt6 REQUIRED COMPONENTS Widgets) qt_standard_project_setup() qt_add_executable(hello main.cpp ) target_link_libraries(hello PRIVATE Qt6::Widgets) set_target_properties(hello PROPERTIES WIN32_EXECUTABLE ON MACOSX_BUNDLE OFF )This is similar to the CMake build file used earlier, but it has additional elements needed to build Qt 6 applications. For further information, see Lecture 5 or Getting Started With CMake on the Qt documentation website.
Create a
buildsubdirectory and run CMake using the following chain of commands:mkdir build && cd build && cmake ..Then run the build with
cmake --build .or, easier still (on Linux / macOS):
makeThis should create the executable
helloin thebuildsubdirectory.Run the application with
./hello. You should see a small window appear, containing “Hello World!” in a large bold font.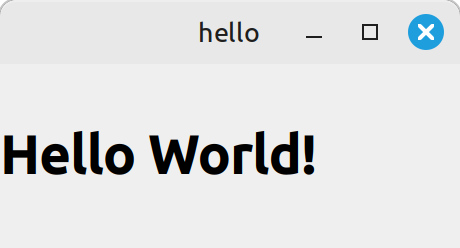 Note
NoteThe above screenshot was taken after resizing the window.
Exactly what you see will depend upon the desktop environment that you are using. Window decoration will vary between environments, for example. Qt respects desktop theme choices, so you might see light text on a dark background in some cases.
Experimenting
Experiment with configuring the QLabel widget in various ways.
Try configuring a font by calling
setFont(), with aQFontobject as an argument. You could create the latter withQFont font("Times", 14, QFont::Bold);Try changing the appearance by calling
setStyleSheet():widget->setStyleSheet("color: red");Try centering the text with
widget->setAlignment(Qt::AlignCenter);Try fixing the window size by invoking
setFixedSize()on the widget. Then try enforcing a minimum size for the window by invokingsetMinimumSize().
Footnotes
However, note that it is also possible to write Qt applications in Python.↩︎