Programming Widget Layout
You might find it useful to have the Qt Widgets class reference open in a separate browser tab before you begin work on this exercise.
Experimenting With QHBoxLayout
Create a directory for this exercise, then create a subdirectory within it called
hbox. Inside that subdirectory, create a file namedmain.cpp, containing the following code:#include <QtWidgets> int main(int argc, char* argv[]) { QApplication app(argc, argv); QWidget* window = new QWidget(); window->setWindowTitle("QHBoxLayout Test"); window->show(); return app.exec(); }NoteNotice the use of
QWidgetto represent the application’s window. Qt has a ‘proper’ window class calledQMainWindowthat supports the use of menu bars, etc, but we aren’t using any of those features here, soQWidgetwill suffice for now.Copy the
CMakeLists.txtfile from the previous exercise to the current directory. Edit this file, replacing all four occurrences ofhellowithhbox.Create a build subdirectory, run CMake in it and attempt to build the application:
mkdir build && cd build
cmake ..
make
Don’t bother running the application yet; there won’t be anything interesting to see!
Add code to
main.cppto create threeQPushButtonobjects. Remember to create them on the heap and reference them using pointers. Usebutton1,button2,button3as the names of these pointer variables. Use any word or short phrase you like for the button text in each case.Now create a
QHBoxLayoutobject and add the three buttons to it. The following code, put before the call to theshow()method, should do the trick:QHBoxLayout* layout = new QHBoxLayout(); layout->addWidget(button1); layout->addWidget(button2); layout->addWidget(button3);Add code to make this the layout used by the
QWidgetobject representing the application window:window->setLayout(layout);Rebuild the application and run it. Try resizing the window, both horizontally and vertically, and observe how it behaves.
Change
main.cppso that it creates a label, a text field and a button, instead of three buttons. UseQLabelfor the label andQLineEditfor the text field. The following code should do the trick:QLabel* label = new QLabel("&Name:"); QLineEdit* nameField = new QLineEdit(); label->setBuddy(nameField);Notice the
&Nin the label text, and how the label’ssetBuddy()method is called, to associate the label with the text field. Depending on your OS, these two steps should allow users to shift focus to the text field using a keyboard shortcut (e.g., Alt+NAlt+N)1.Rebuild and run the application. It should look something like this:
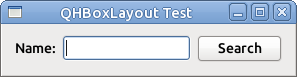
Try resizing the window horizontally and vertically, as you did before. How has the resizing behaviour changed?
Add the following between the
addWidget()method calls for the text field and button:layout->addStretch();Rebuild and run the application. How has its resizing behaviour changed?
Move the call to
addStretch()so that it is before the line that adds theQLabelwidget to the layout. Add a second call toaddStretch(), after the line that adds the button to the layout. Rebuild the application and run it again. How has its resizing behaviour changed?
Using QFormLayout
You’ve seen an example of putting a label alongside a corresponding input field using QHBoxLayout. This is such a common requirement that Qt provides a specific layout class, QFormLayout, to support it.
QFormLayout can create the labels and buddy them with the associated input fields for you:
QFormLayout* form = new QFormLayout();
form->addRow("&Name", nameField);
QFormLayout will also align labels and input fields if there are multiple rows in the form, creating a neat two-column layout. Rows of the layout can be wrapped so that the labels appear above the corresponding input fields when horizontal space is limited.
Create a new directory named
form, alongside (not inside) thehboxdirectory. In this create a file namedmain.cpp, containing the following code:#include <QtWidgets> int main(int argc, char* argv[]) { QApplication app(argc, argv); QWidget* window = new QWidget(); window->setWindowTitle("QFormLayout Test"); // Create widgets QLineEdit* nameField = new QLineEdit(); QLineEdit* emailField = new QLineEdit(); QSpinBox* ageField = new QSpinBox(); ageField->setRange(1, 100); // Arrange widgets QFormLayout* form = new QFormLayout(); form->addRow("Full &Name:", nameField); form->addRow("&Email:", emailField); form->addRow("&Age:", ageField); window->setLayout(form); // Activate UI window->show(); return app.exec(); }Copy
CMakeLists.txtfrom thehboxdirectory into theformdirectory. Edit the copy, replacing all occurrences ofhboxwithform.Use CMake to build the application, then run it. You should see something like this:

Try using the
Tabkey to move between input fields. Check that the keyboard shortcuts work (Alt+NAlt+N, Alt+EAlt+E, Alt+AAlt+A), if they are available on your system.Try changing the label alignment by adding the following line to the program:
form->setLabelAlignment(Qt::AlignRight);(If labels were already right-aligned on the platform on which you are running the program, use
Qt::AlignLeftinstead.)Remove the line that modified label alignment, then try changing the wrapping behaviour by adding the following line:
form->setRowWrapPolicy(QFormLayout::WrapAllRows);When you rebuild and rerun the application, you should see that the labels are now above their corresponding input fields.
Using QGridLayout
You’re on your own for this one!
Give it a try, following the advice below. Consult the documentation for QGridLayout and other classes as needed. If you get stuck, a sample solution is available.
Write a Qt application that uses QGridLayout to create a numeric keypad resembling the one shown below.

Use this code as your starting point:
#include <QtWidgets>

int main(int argc, char* argv[])
{
  QApplication app(argc, argv);

  // Create a window for the application

  // Create numeric display widget and add it to a grid

  // Create numeric keys and add them to grid

  int keyInfo[][3] = {
    // key number, row, column
    {0, 4, 0},
    {1, 3, 0},
    {2, 3, 1},
    {3, 3, 2},
    {4, 2, 0},
    {5, 2, 1},
    {6, 2, 2},
    {7, 1, 0},
    {8, 1, 1},
    {9, 1, 2}
  };

  // Create Enter key and add it to grid

  // Set window's layout to be the grid and make it visible

  return app.exec();
}
Copy and modify a CMakeLists.txt file from a previous task to set up the build process.
The following notes may help:
You should use
QLCDNumberto represent the numeric display (assume 6 digits).You should call
setMinimumHeight()on yourQLCDNumberwidget, to impose a minimum height of 80 pixels.You should use
QPushButtonto represent the keys.You should add the numeric keys by calling
addWidget()on theQGridLayoutobject, passing in aQPushButtonobject, row and column. This is best done using aforloop. The array provided for you in the code above contains each button’s value and row & column coordinates. You can convert the numeric value of a key to a string, suitable for use as a label on the button, using code like this:QString keyText = QString::number(keyInfo[i][0]);You should add the display and the Enter key to the grid by calling
addWidget()on theQGridLayoutobject, passing in the component, the row, the column, the row span and the column span.
Try resizing the window after you run the application.
Nested Layout Challenge
An exercise in Lecture 7 explored how we might build a complex layout using only QHBoxLayout and QVBoxLayout:
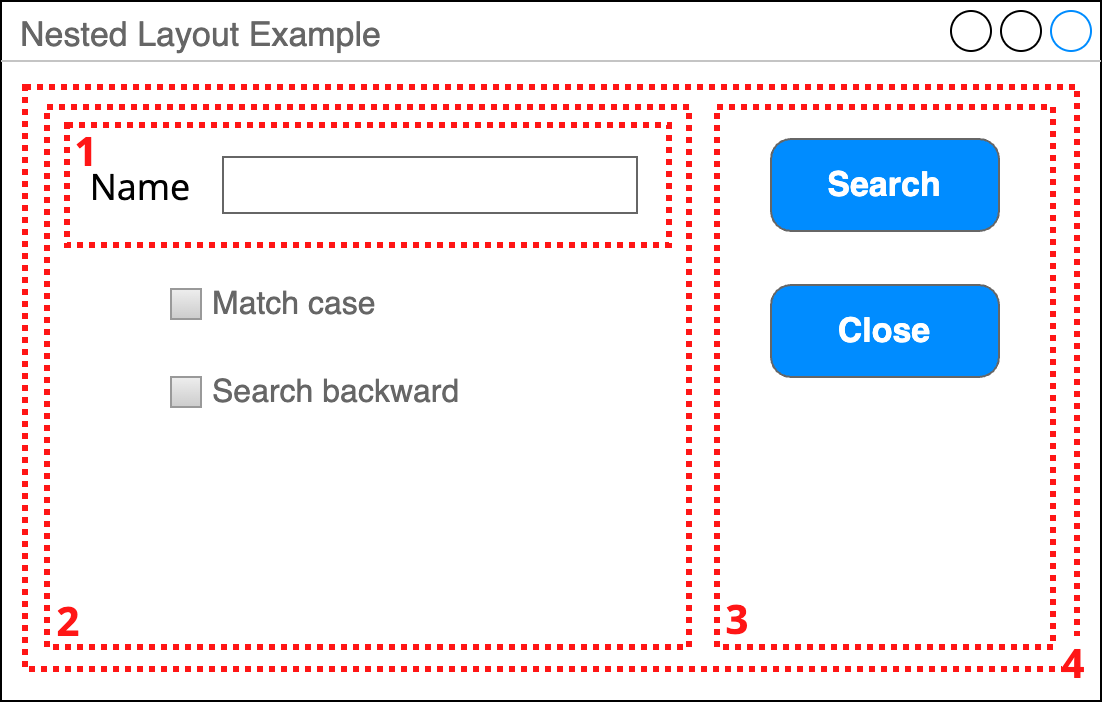
Your final task in this exercise is to implement this in Qt! We won’t offer any further help with this here, but if you apply everything you’ve learned so far then you should be able to manage it.
If you get stuck, a sample solution is available. However, please try to carry out this task on your own first, before consulting the solution.
Footnotes
We give keyboard shortcuts appropriate to Linux here. According to the Qt docs, keyboard shortcuts for Windows should also use
Altbut may not show up until you actually press theAltkey. The docs also suggest that these keyboard shortcuts aren’t enabled by default on Macs.↩︎